
I have finished Liza Jane and what a busy day I have had.
I have been through all of Kit 12 in a little over a day.
Kit 12 starts with the cab body and fitting the windows. I had to file down the Perspex to get them to fit into the, now painted, gaps. Then on went the brass frames. I really found the Polly box spanner excellent for this part of the build.
I needed to make sure that all the holes for the reinforcements and stanchions were clear of paint. Then on went the reinforcements at the rear half of the cab.


It was then on to the rear section and more window filing and fitting along with the stanchions and handrails.
The next challenge was refitting the tank.

The tank is fairly tricky as you have to attach it to both the smokebox and the cab. The trick appears to be not do either end up too tight until both ends have some fixings in place.
Once the tank was sorted it was back into the cab to fix a few things.
I recut a new gauge glass with my new cutter. It was so easy and worked without a hitch. I now have a gauge with a red and white back which will make seeing the level easier. It was so good that I have made myself a couple of spares!

I also had to fit the axle pump bypass valve to the back of the tank and attach the very long pipe that comes from the pump at the front of the loco.
Next up for this epic day was the injector. I am so glad that I had done the trial fit as it made this so much easier. Even then I needed to do a bit of fine tuning of the water valve with its microscopic grub screw.
 I thought other builders might appreciate a photo of the pipe run from the injector to the clack on the boiler. Note my running of the pipe under the ram of the hand pump.

With the cab interior was now complete it was back to the outside to do the last elements. On went the cylinder covers which really offset the look of the loco.

Then the stanchions and handrails for the cab. The safety valve has been popped in the photograph here, although you can’t see it, and the dome cover has been fitted correctly
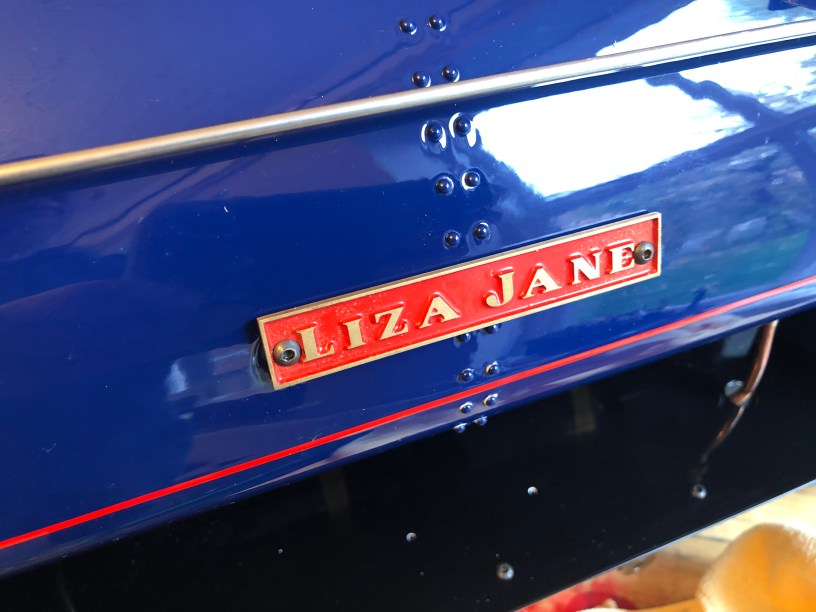
Finally, for the big unveil I attached the name plates which had required a little bit of drilling to allow the button head bolts to pass through.

So here she is, the finished article. I think she is very special, but then I would.

I am sure that there will be quite a few things to fettle. I will discover those when I get to steam her! I haven’t quite determined when that will be but a couple of club members have offered to help me do that. I suspect it will be after our club Bonfire Night special on 9 November, but we shall see.
To all my blog followers, I hope that you have enjoyed following my progress. There will be more blogs to come on the final setup and I will continue to keep you updated on running her and my experiences as a wannabe model engineer.

Congratulations Richard lovely job.
LikeLiked by 1 person
Been watched the build, very well done matey.. looks a great job and sure she’ll do well under steam.
LikeLike
Richard – thank you for the blog and the help you have given me on my journey. I am on kit 10 right now and enjoying the build too… From another Wannabe engineering!
LikeLiked by 1 person
This is really interesting! Looks like it takes a huge amount of patience!
LikeLike
Richard thank you for your blogI am expecting my first kit in a couple of weeks regards Peter
LikeLiked by 1 person